Creating image sliders with the Sliderberg plugin is super easy if you are already used to the Gutenberg block editor. The way of using this block isn’t any different from other blocks. Let’s check how to create your first slider with the plugin.
Step 1: Add the Sliderberg Block to the Editor #
Click the plus (+) icon on the editor. Type Sliderberg in the search box. Once the block appears, add it to the editor.

The block will be added right away.
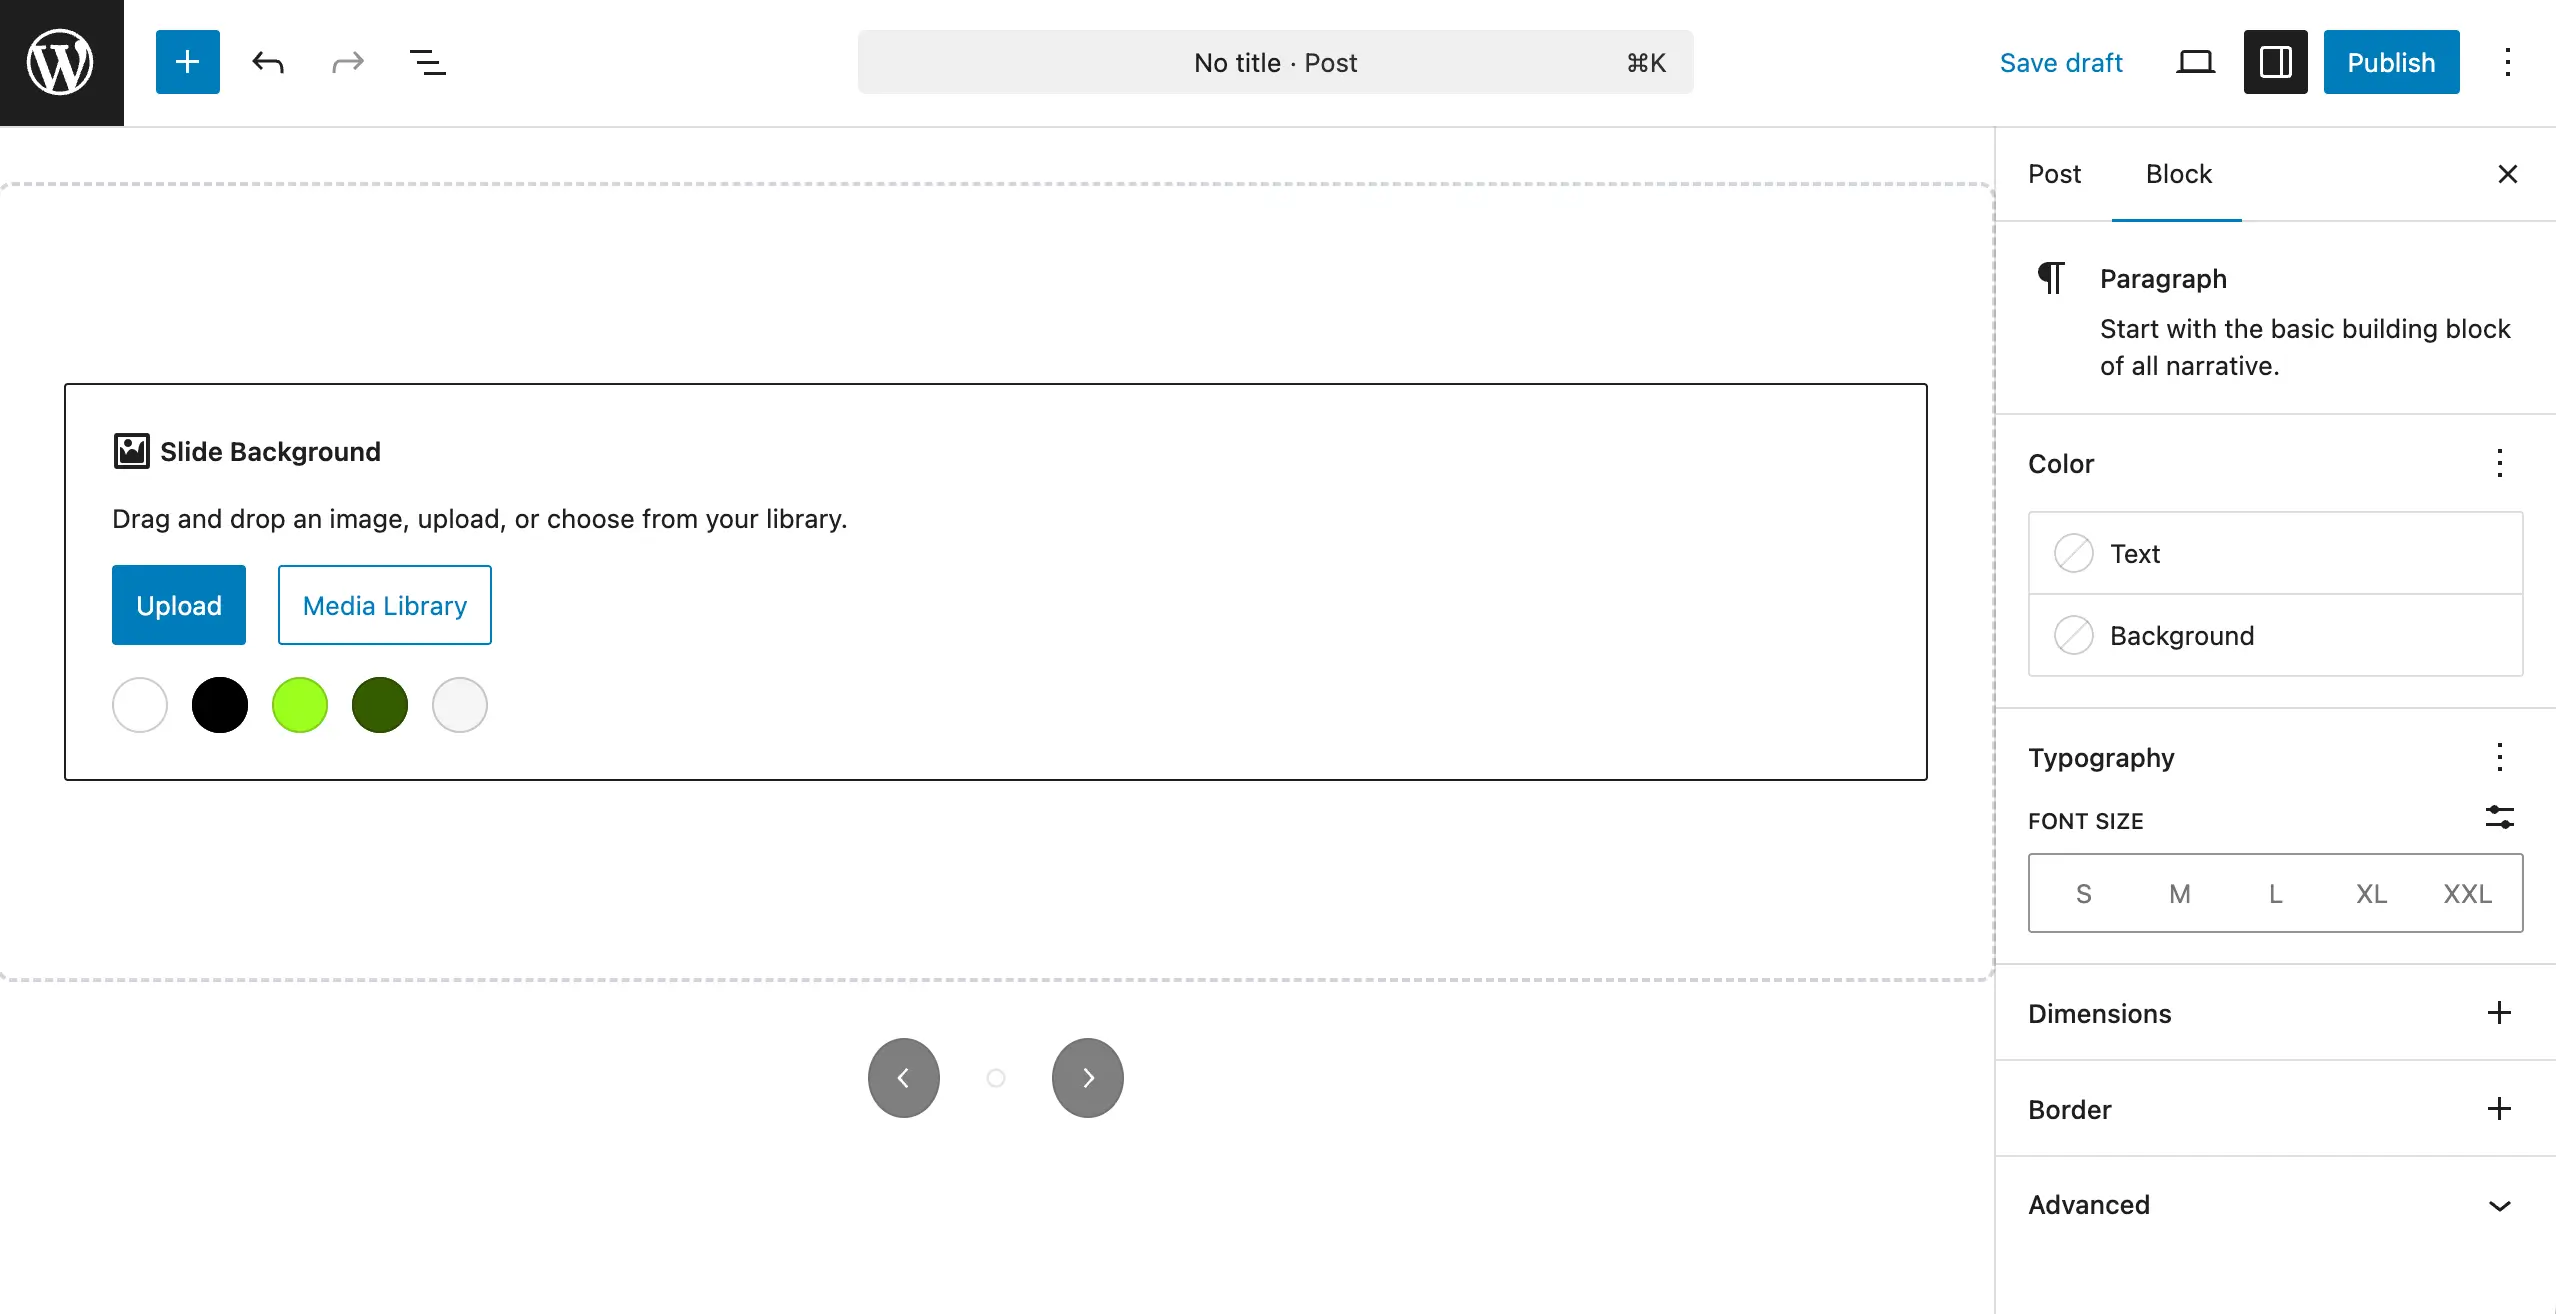
Step 2: Add Images to the Block #
You can upload images from the local drive or just add from the media library. Choose the option you want. Let’s click the Media Library button.
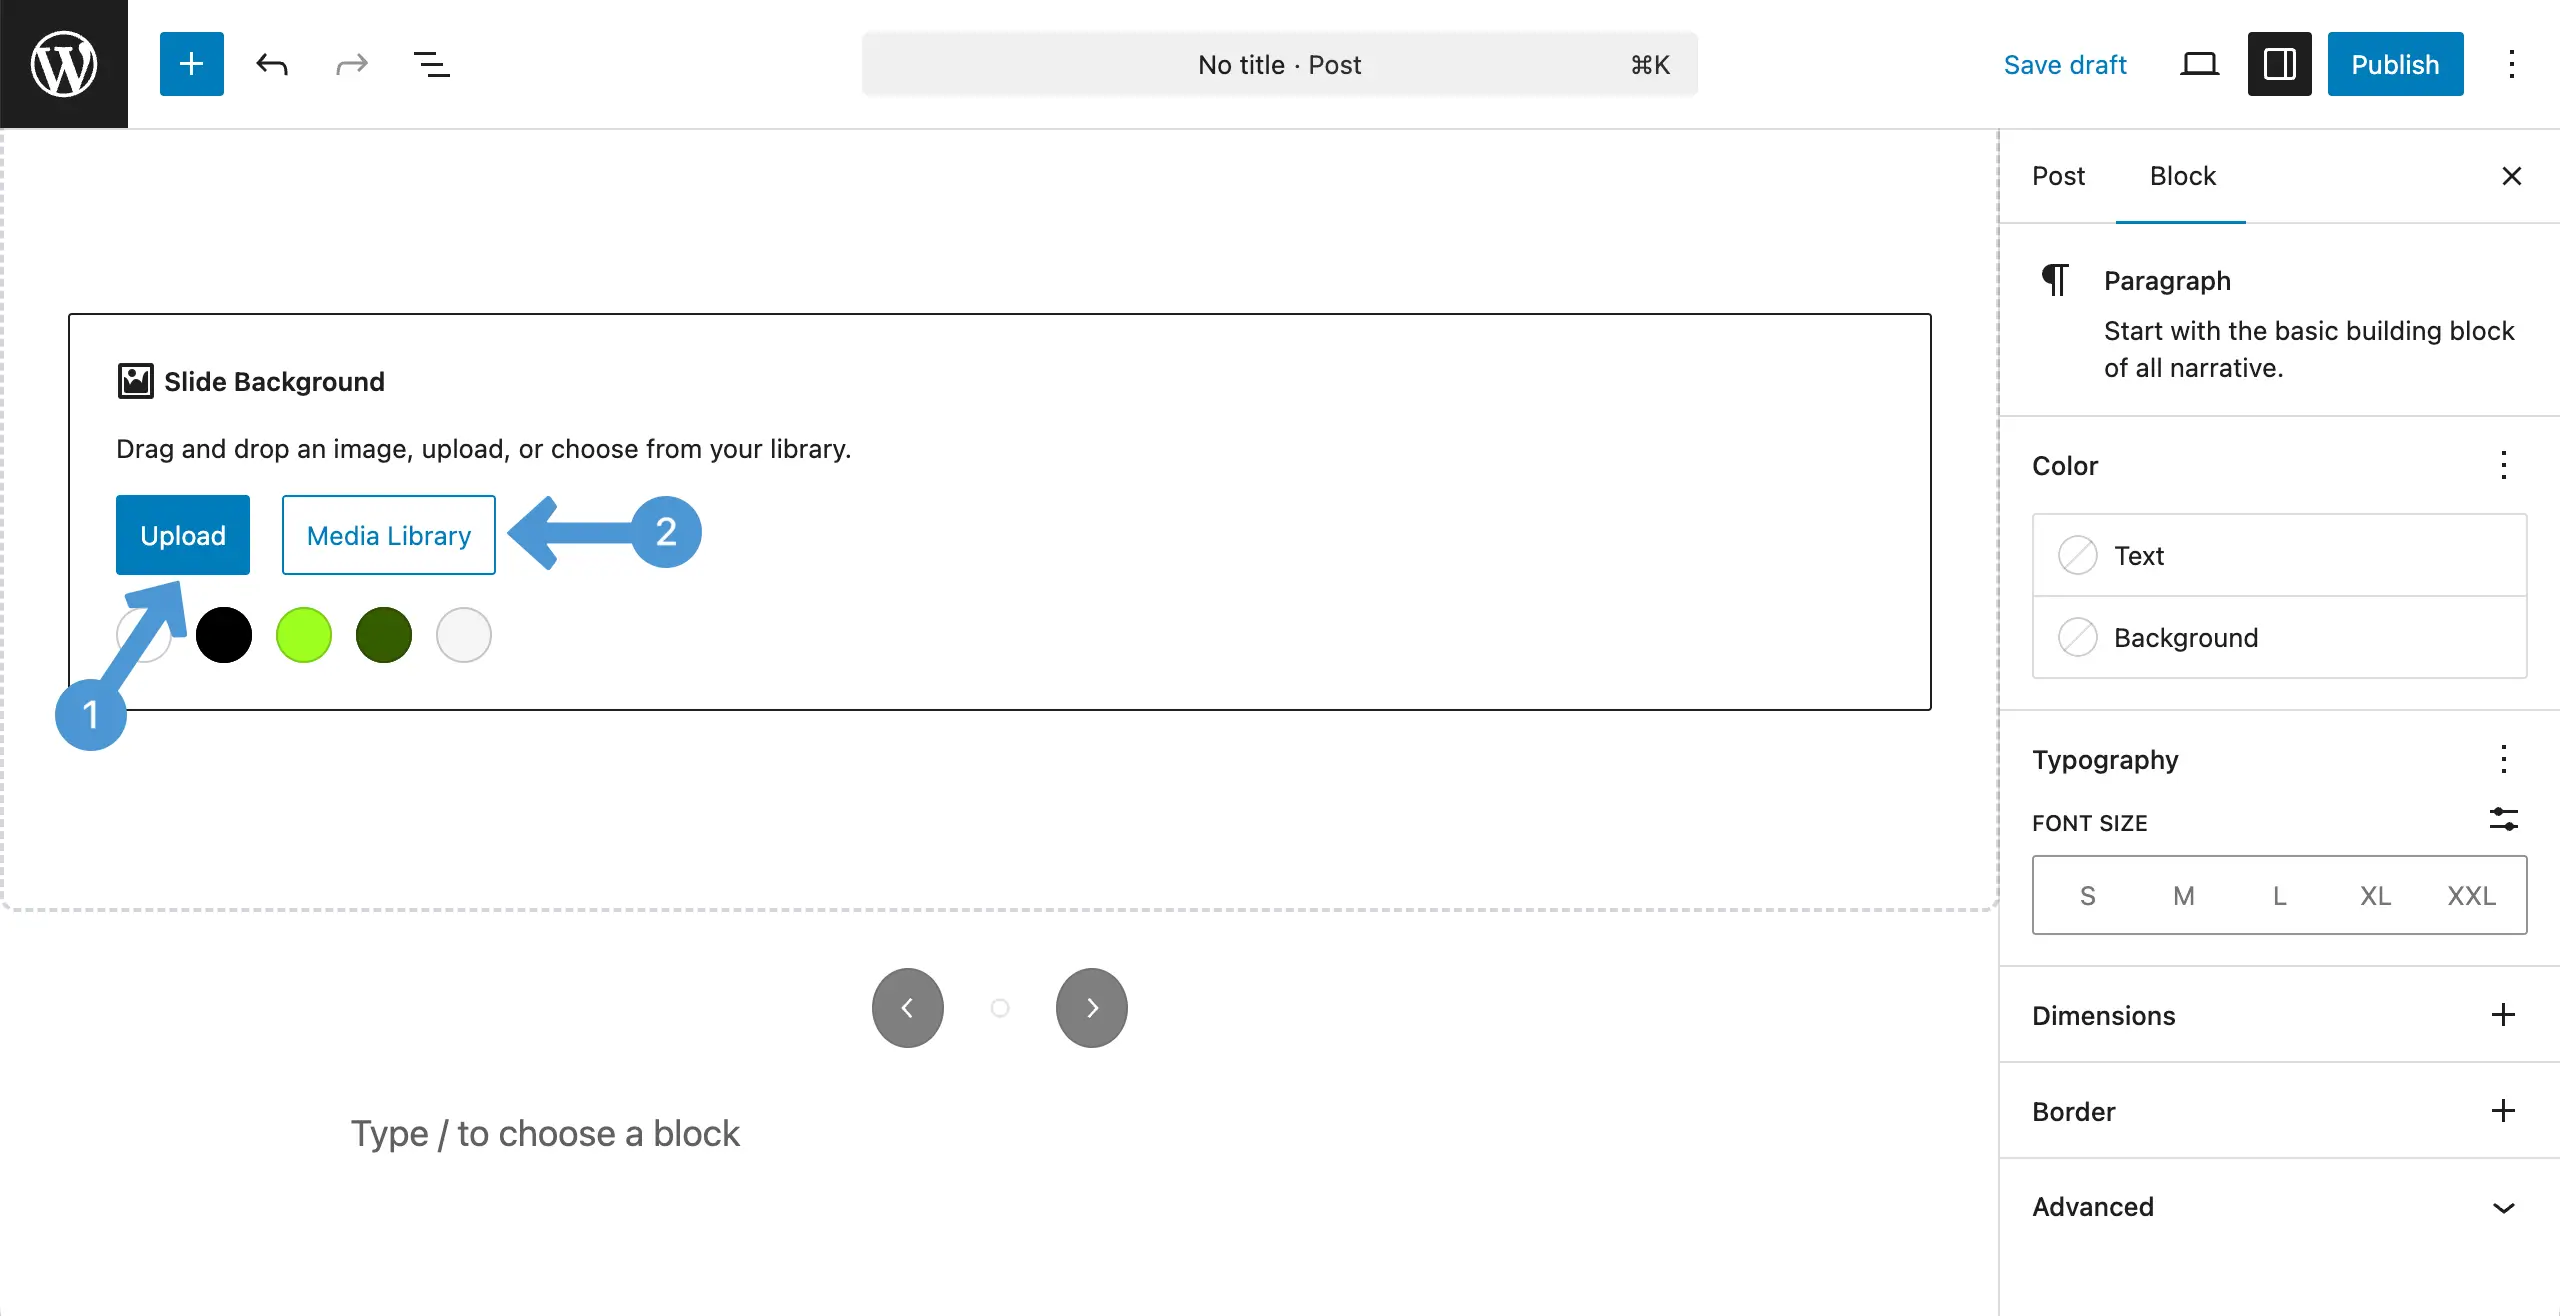
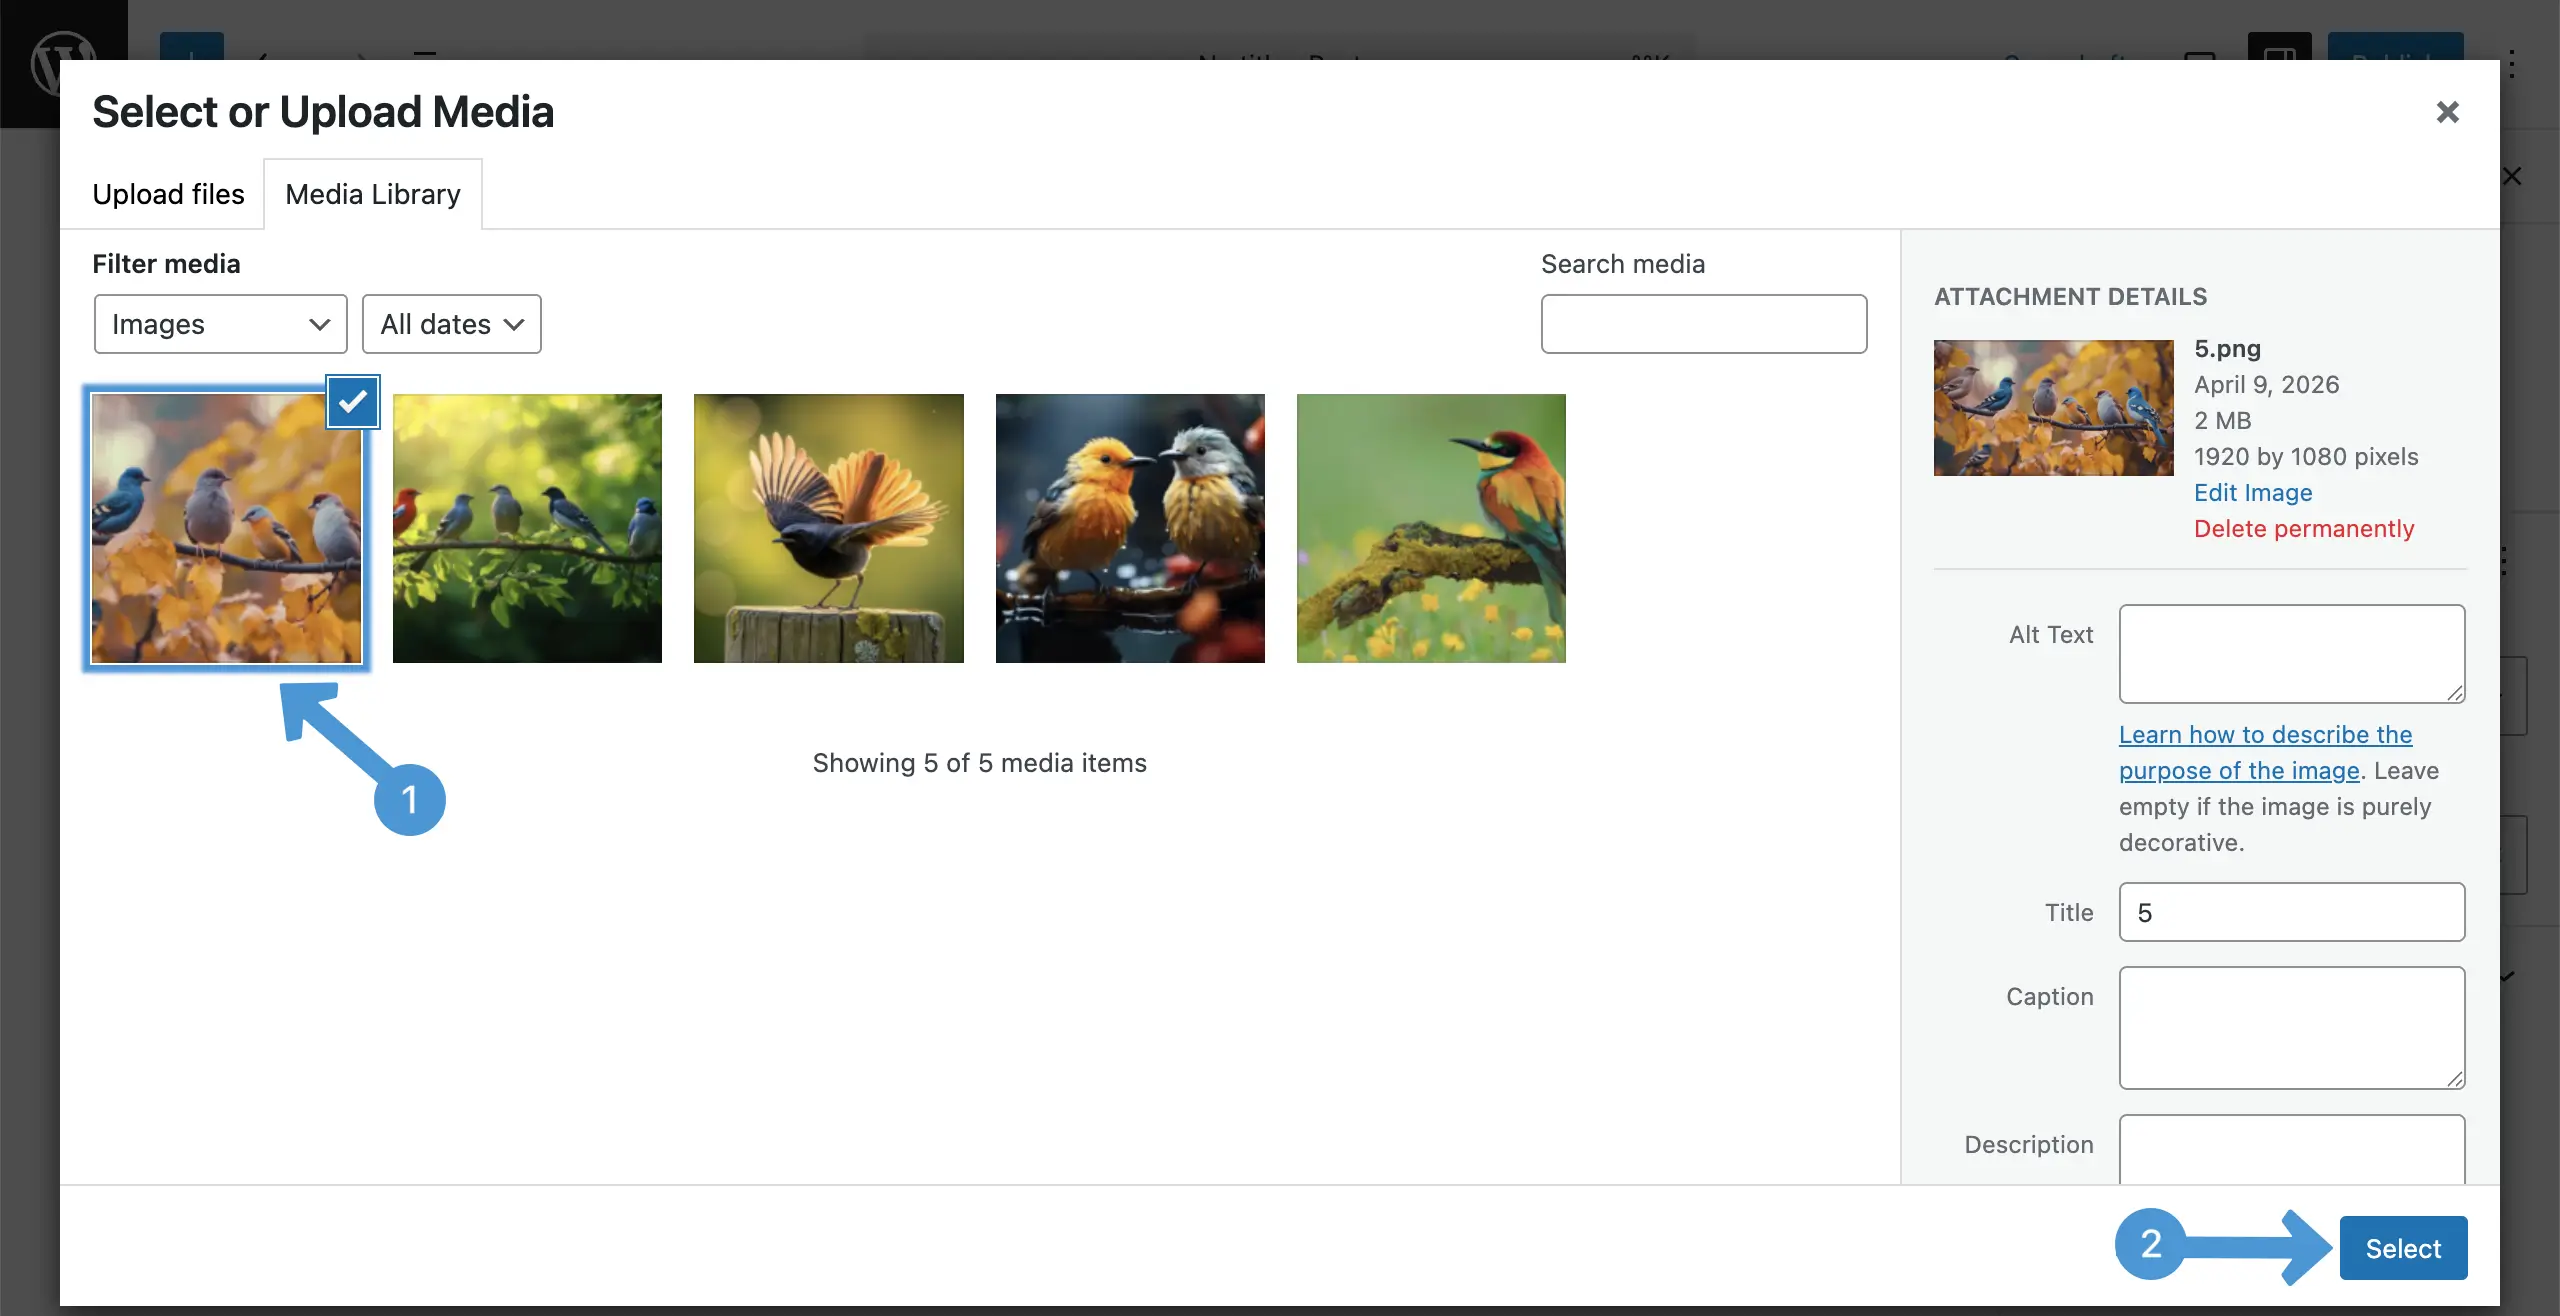
You have to add images to the slider block individually. Choose the first image you want. Then, hit the Select button at the bottom-right corner.
The image will be added to the block instantly. Now, to add another image, click the plus (+) icon on the toolbar.
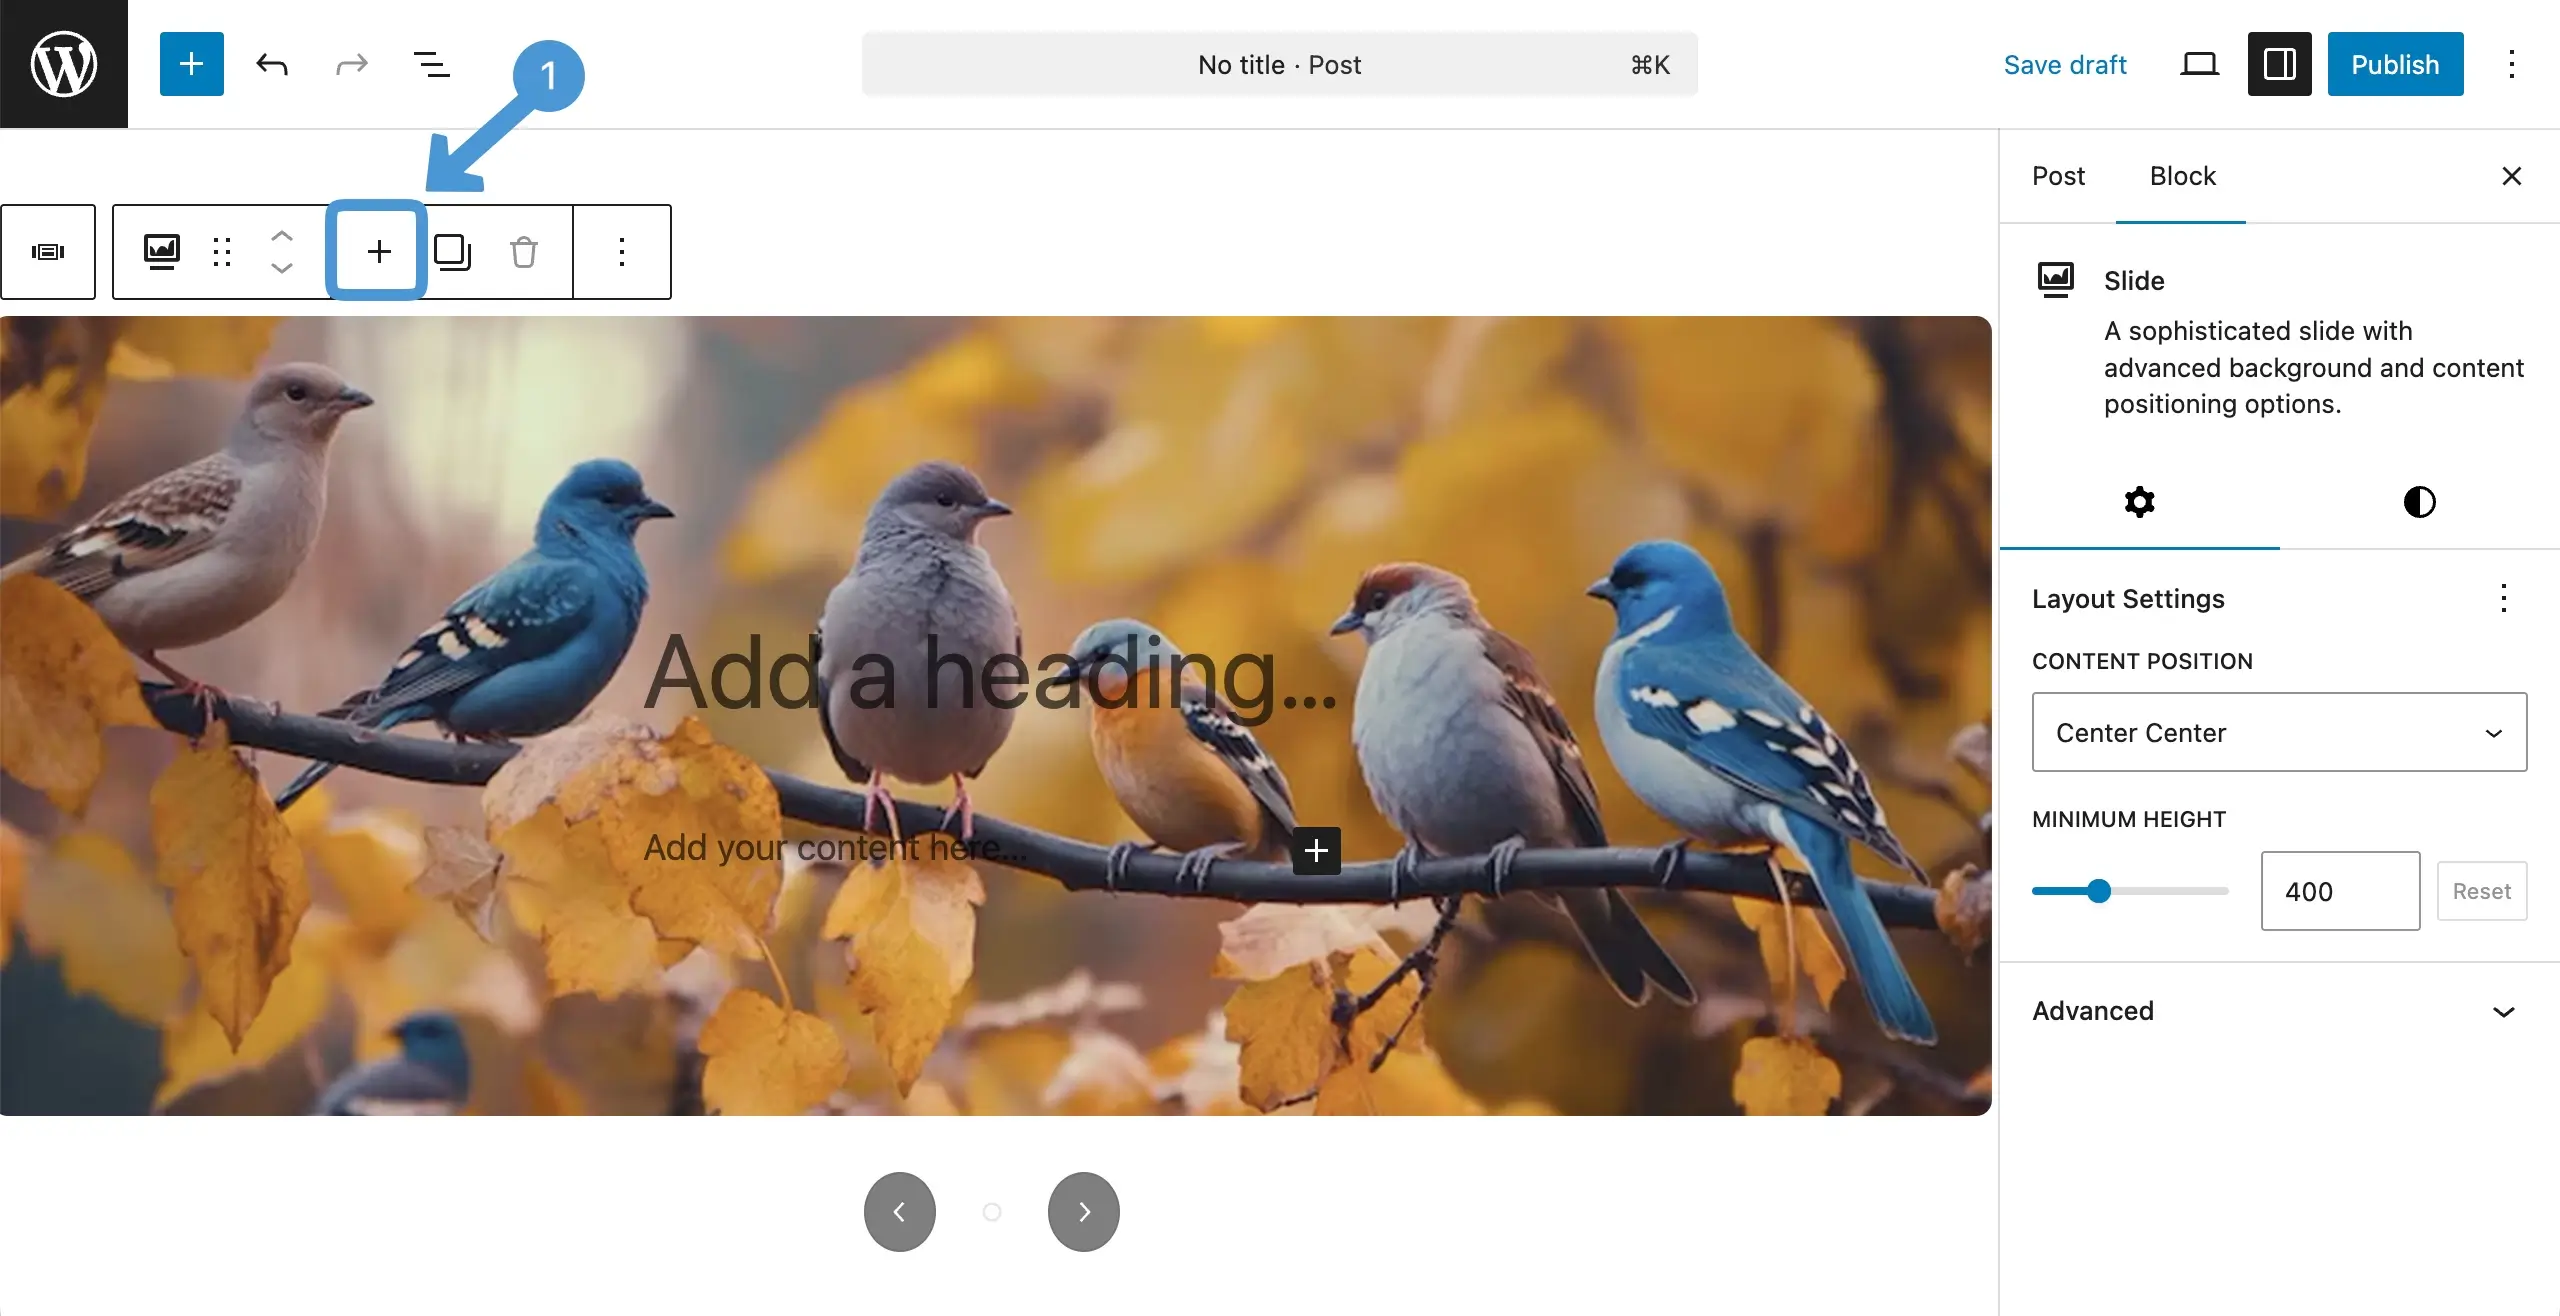
In this way, add as many images as you want to the slider block.
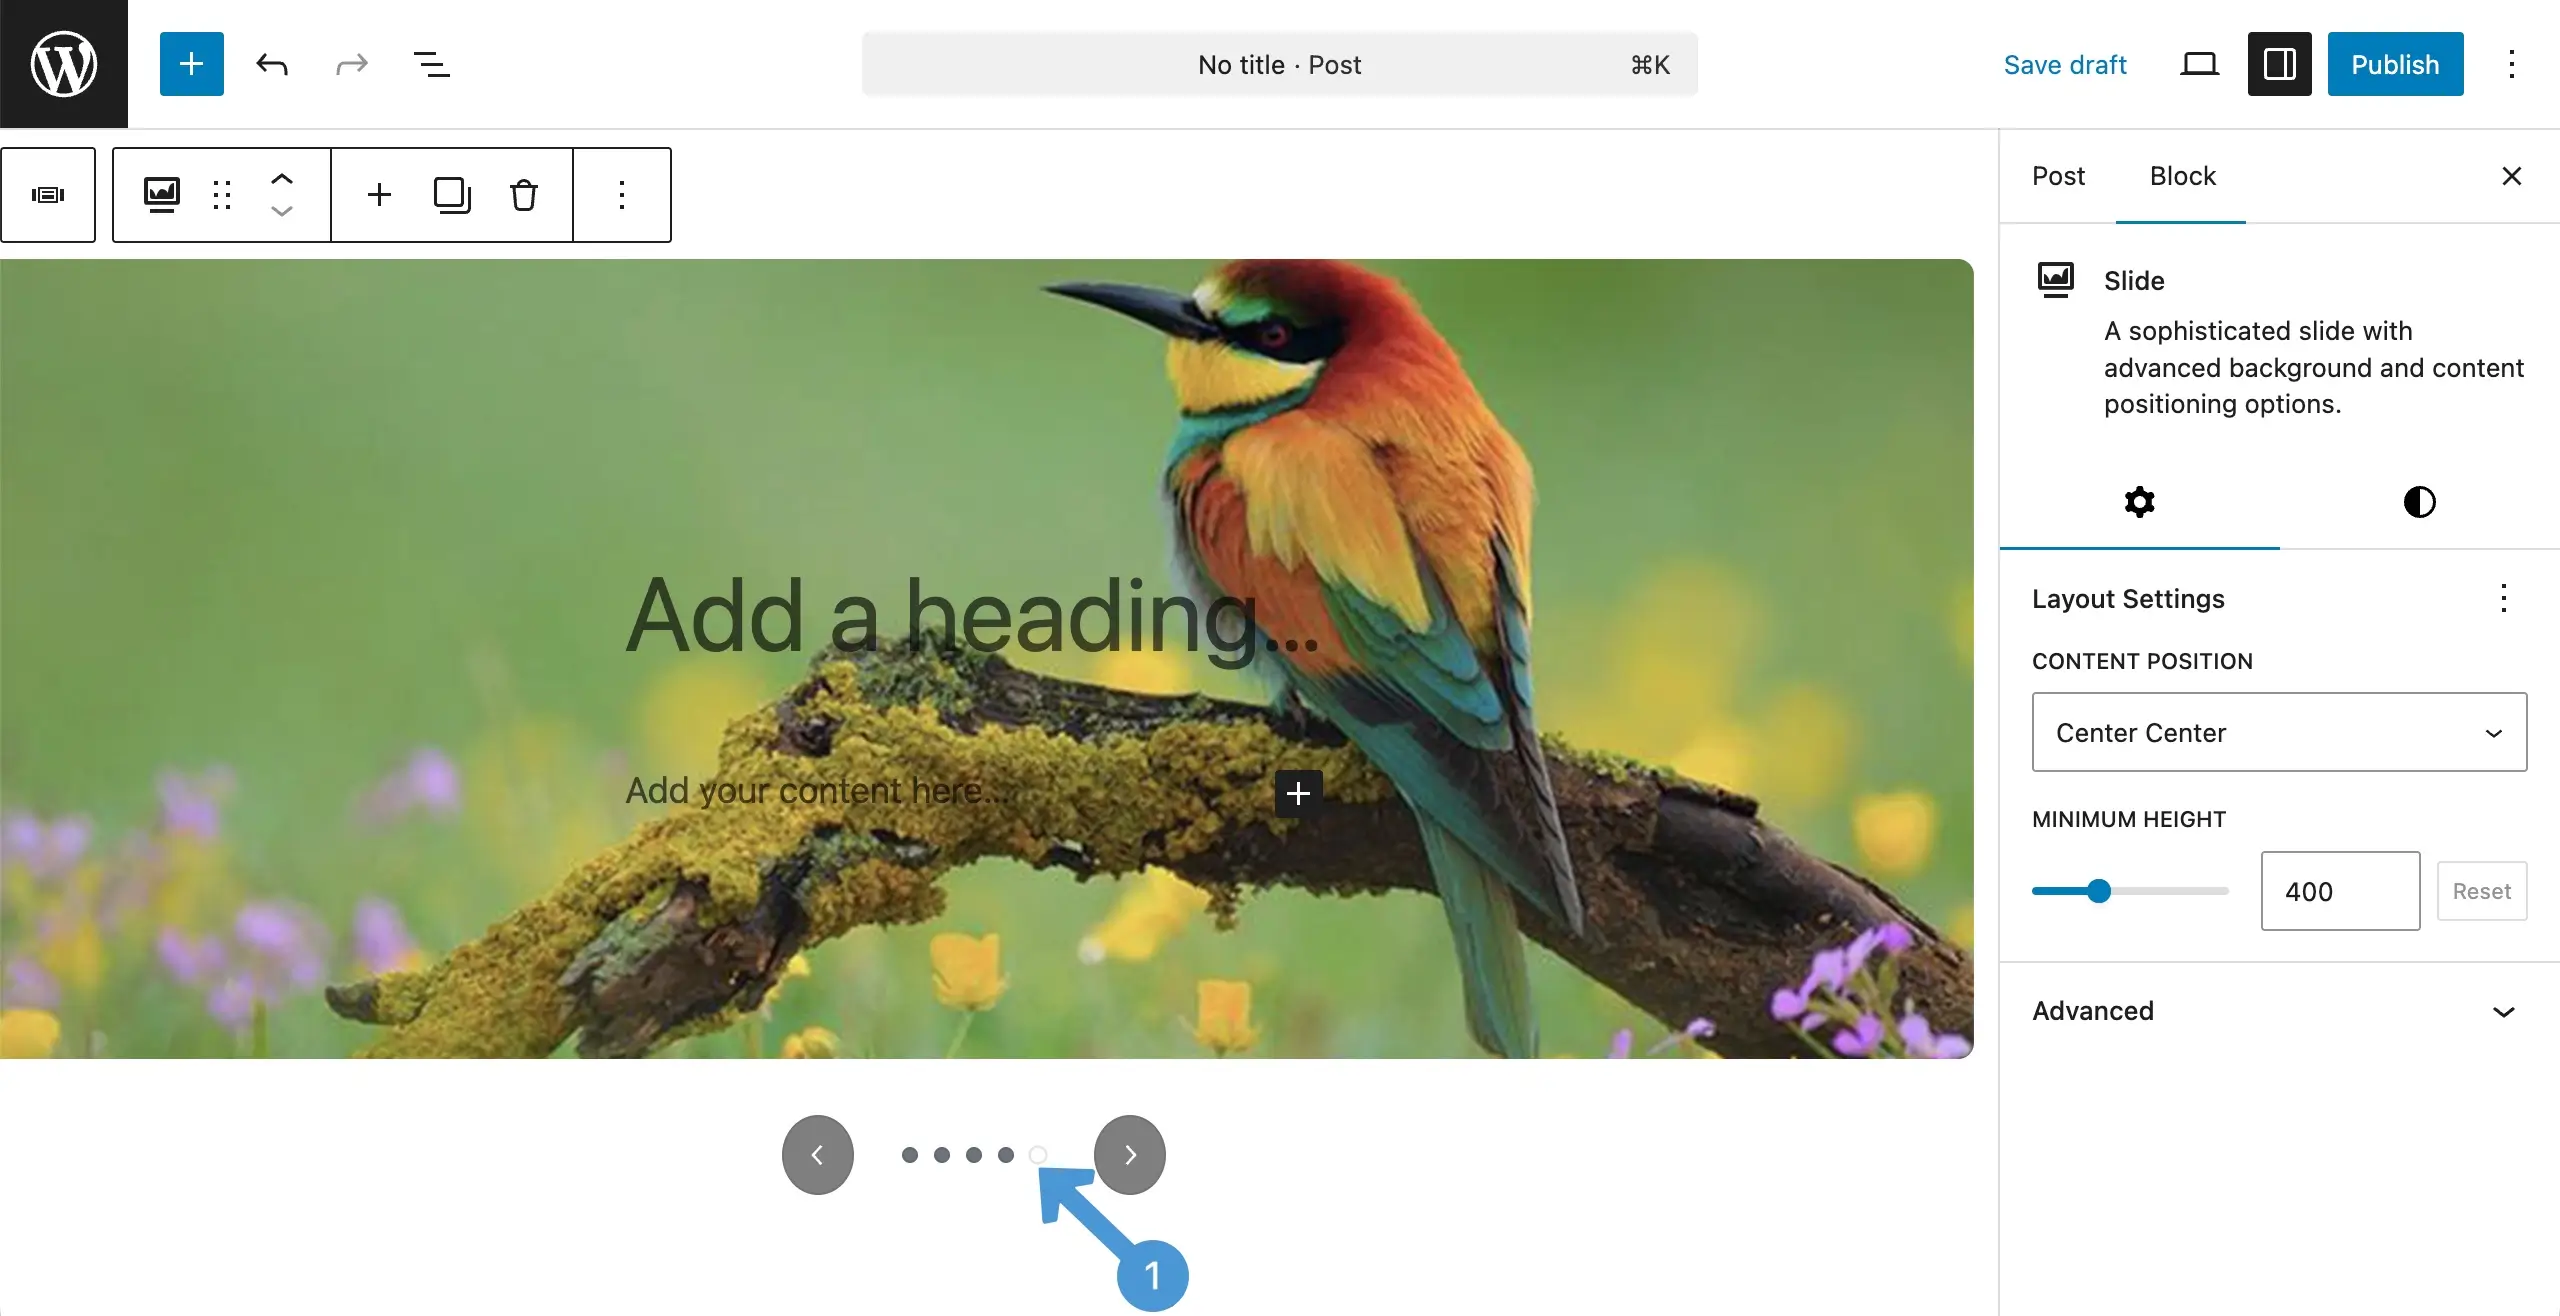
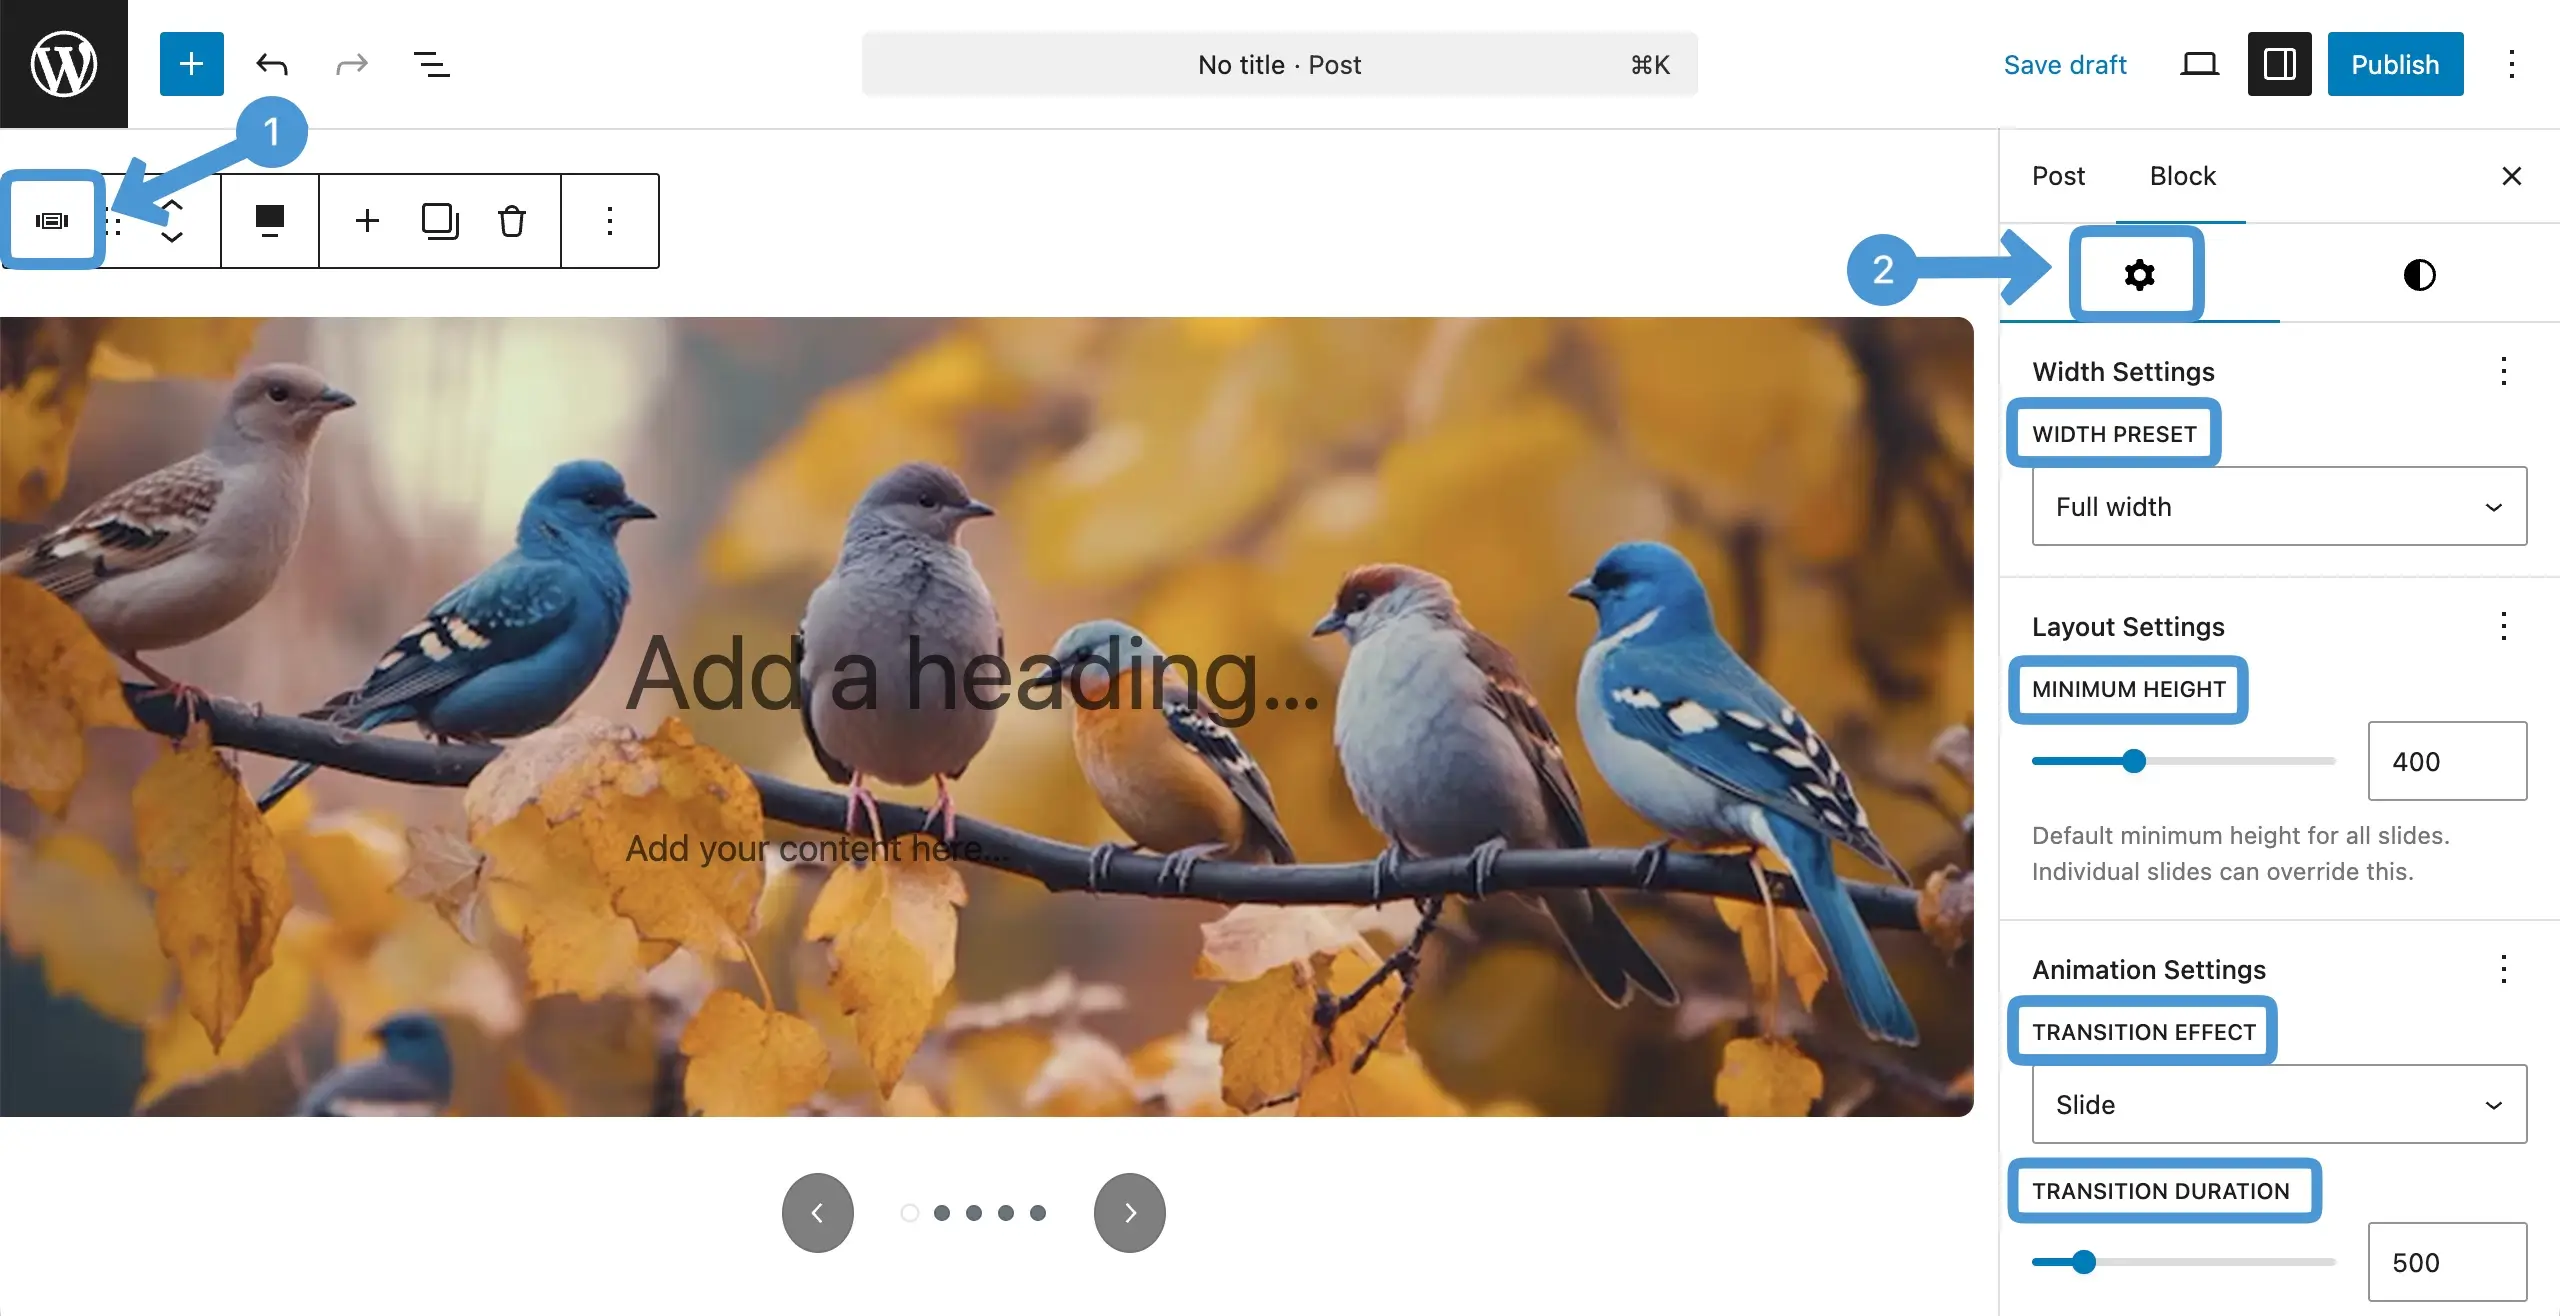
Step 3: Configure Settings of the Sliderberg Block #
Select the entire block by clicking the Sliderberg icon on the toolbar. Once selected, to the settings tab on the right sidebar.
Under the tab, you’ll get these options – width preset, minimum height, transition effect, and transition duration.
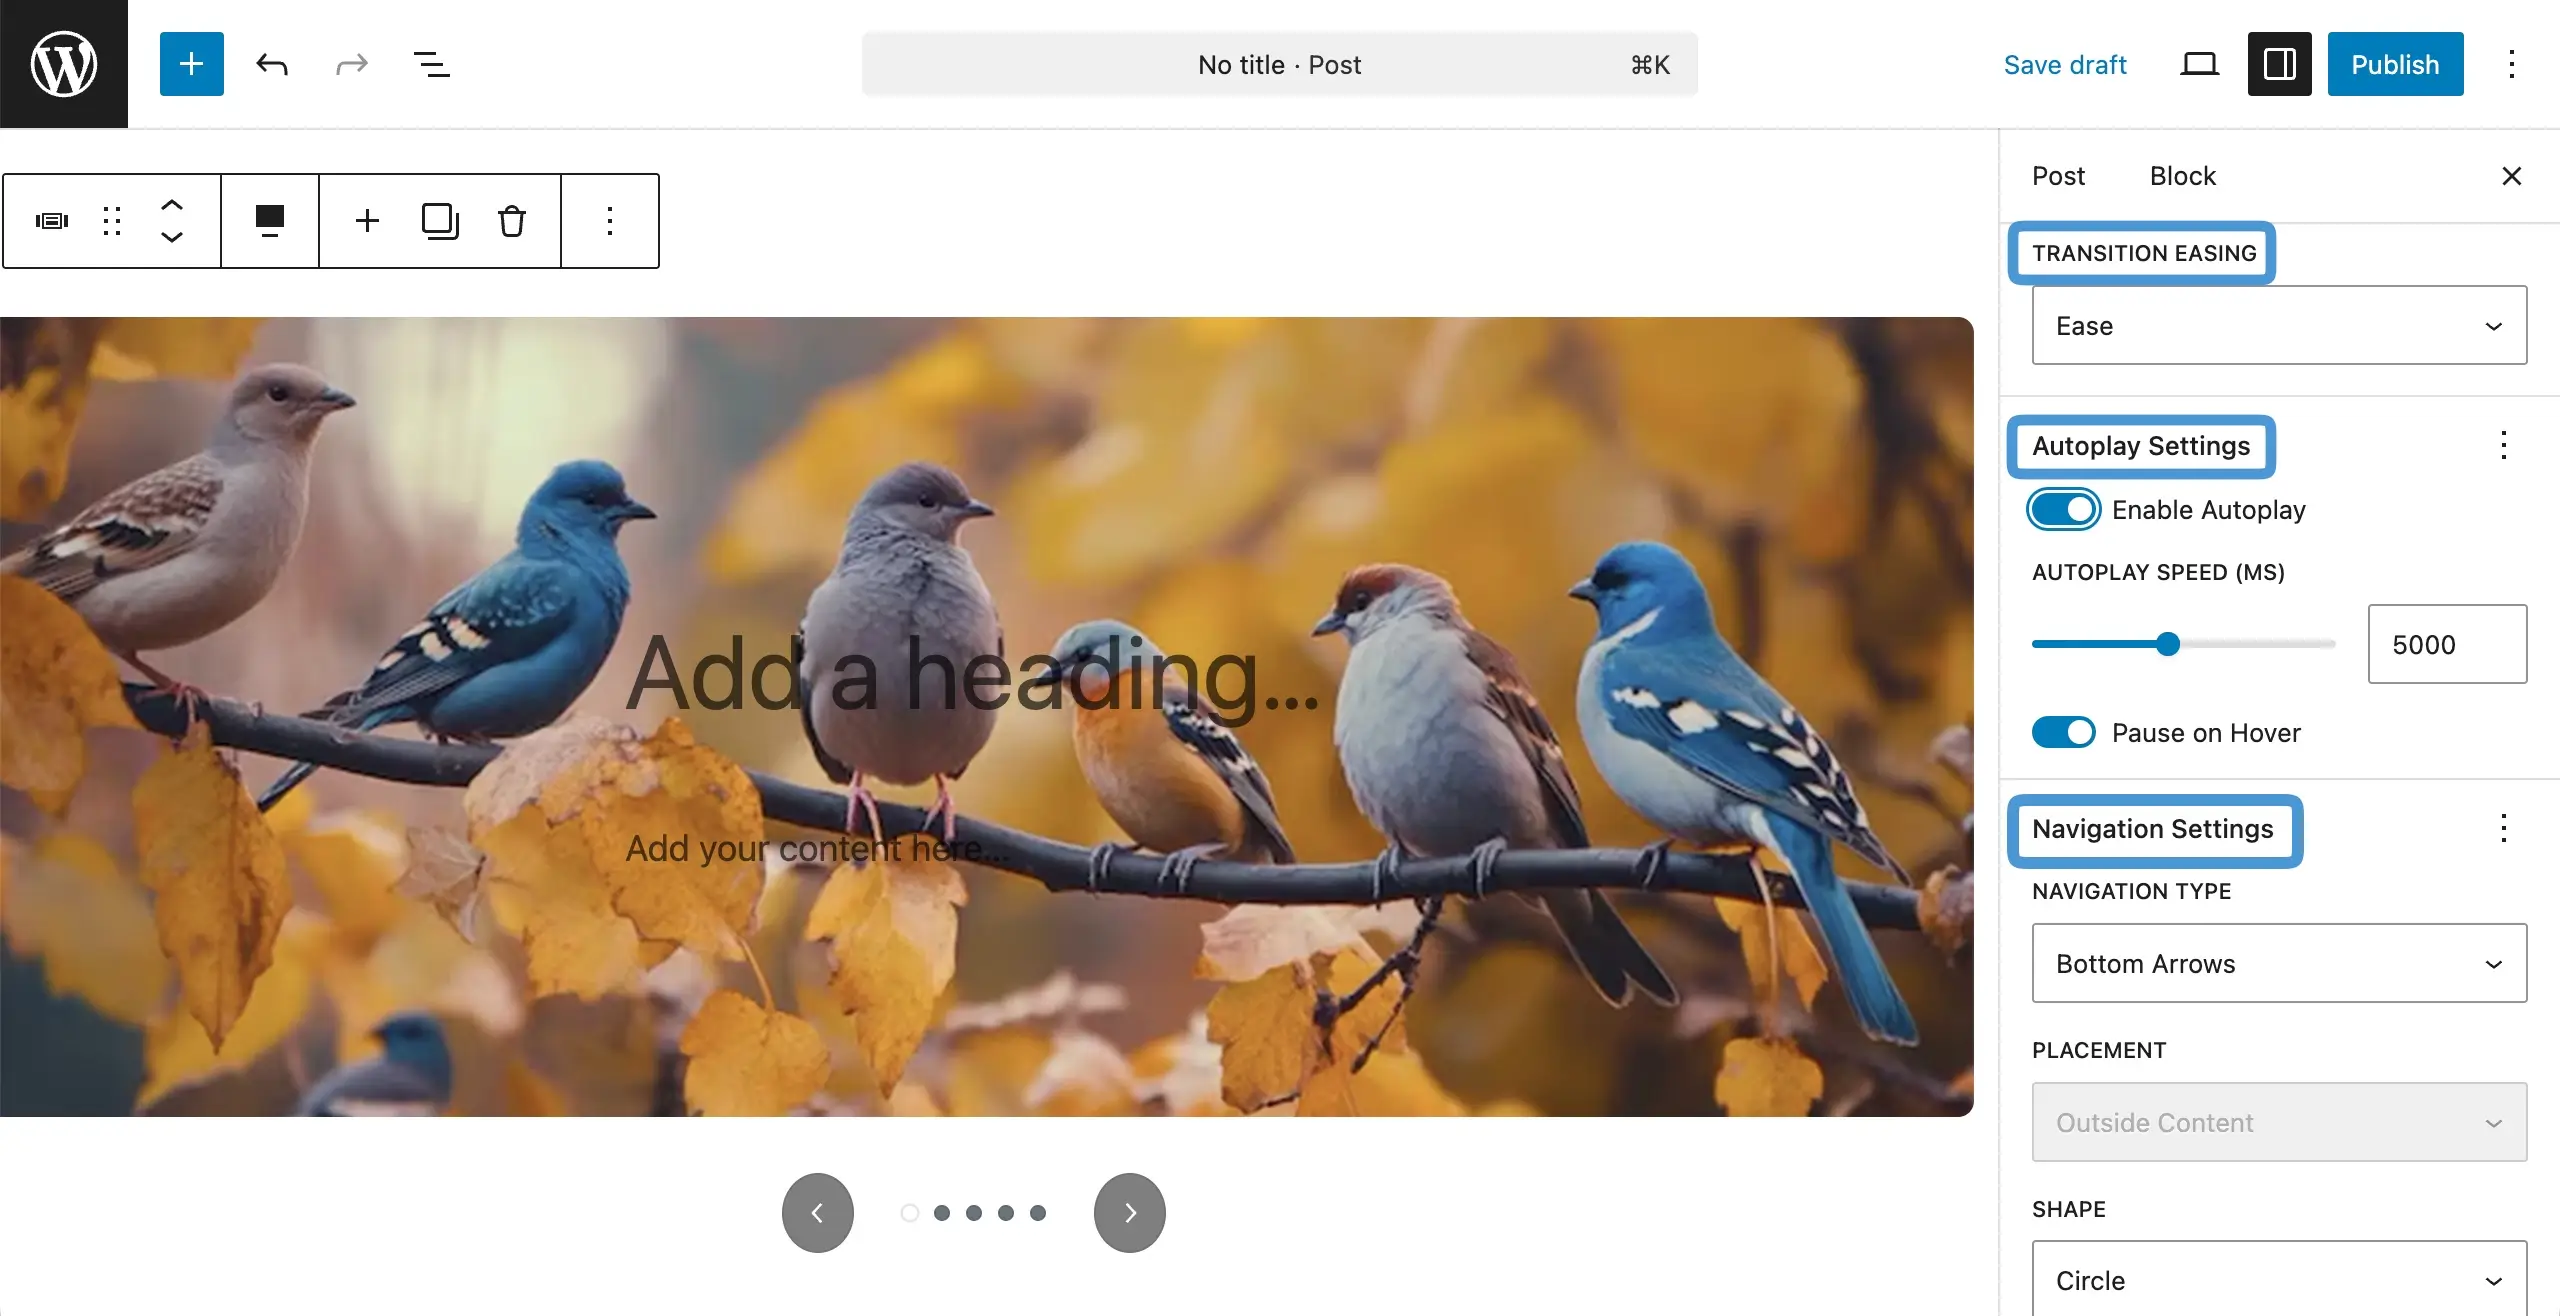
By scrolling down the tab, you will get some more options. They are transition easing, autoplay settings, and navigation settings.
Step 4: Stylize the Sliderberg Block #
To stylize the block, come to the styles tab on the right sidebar.
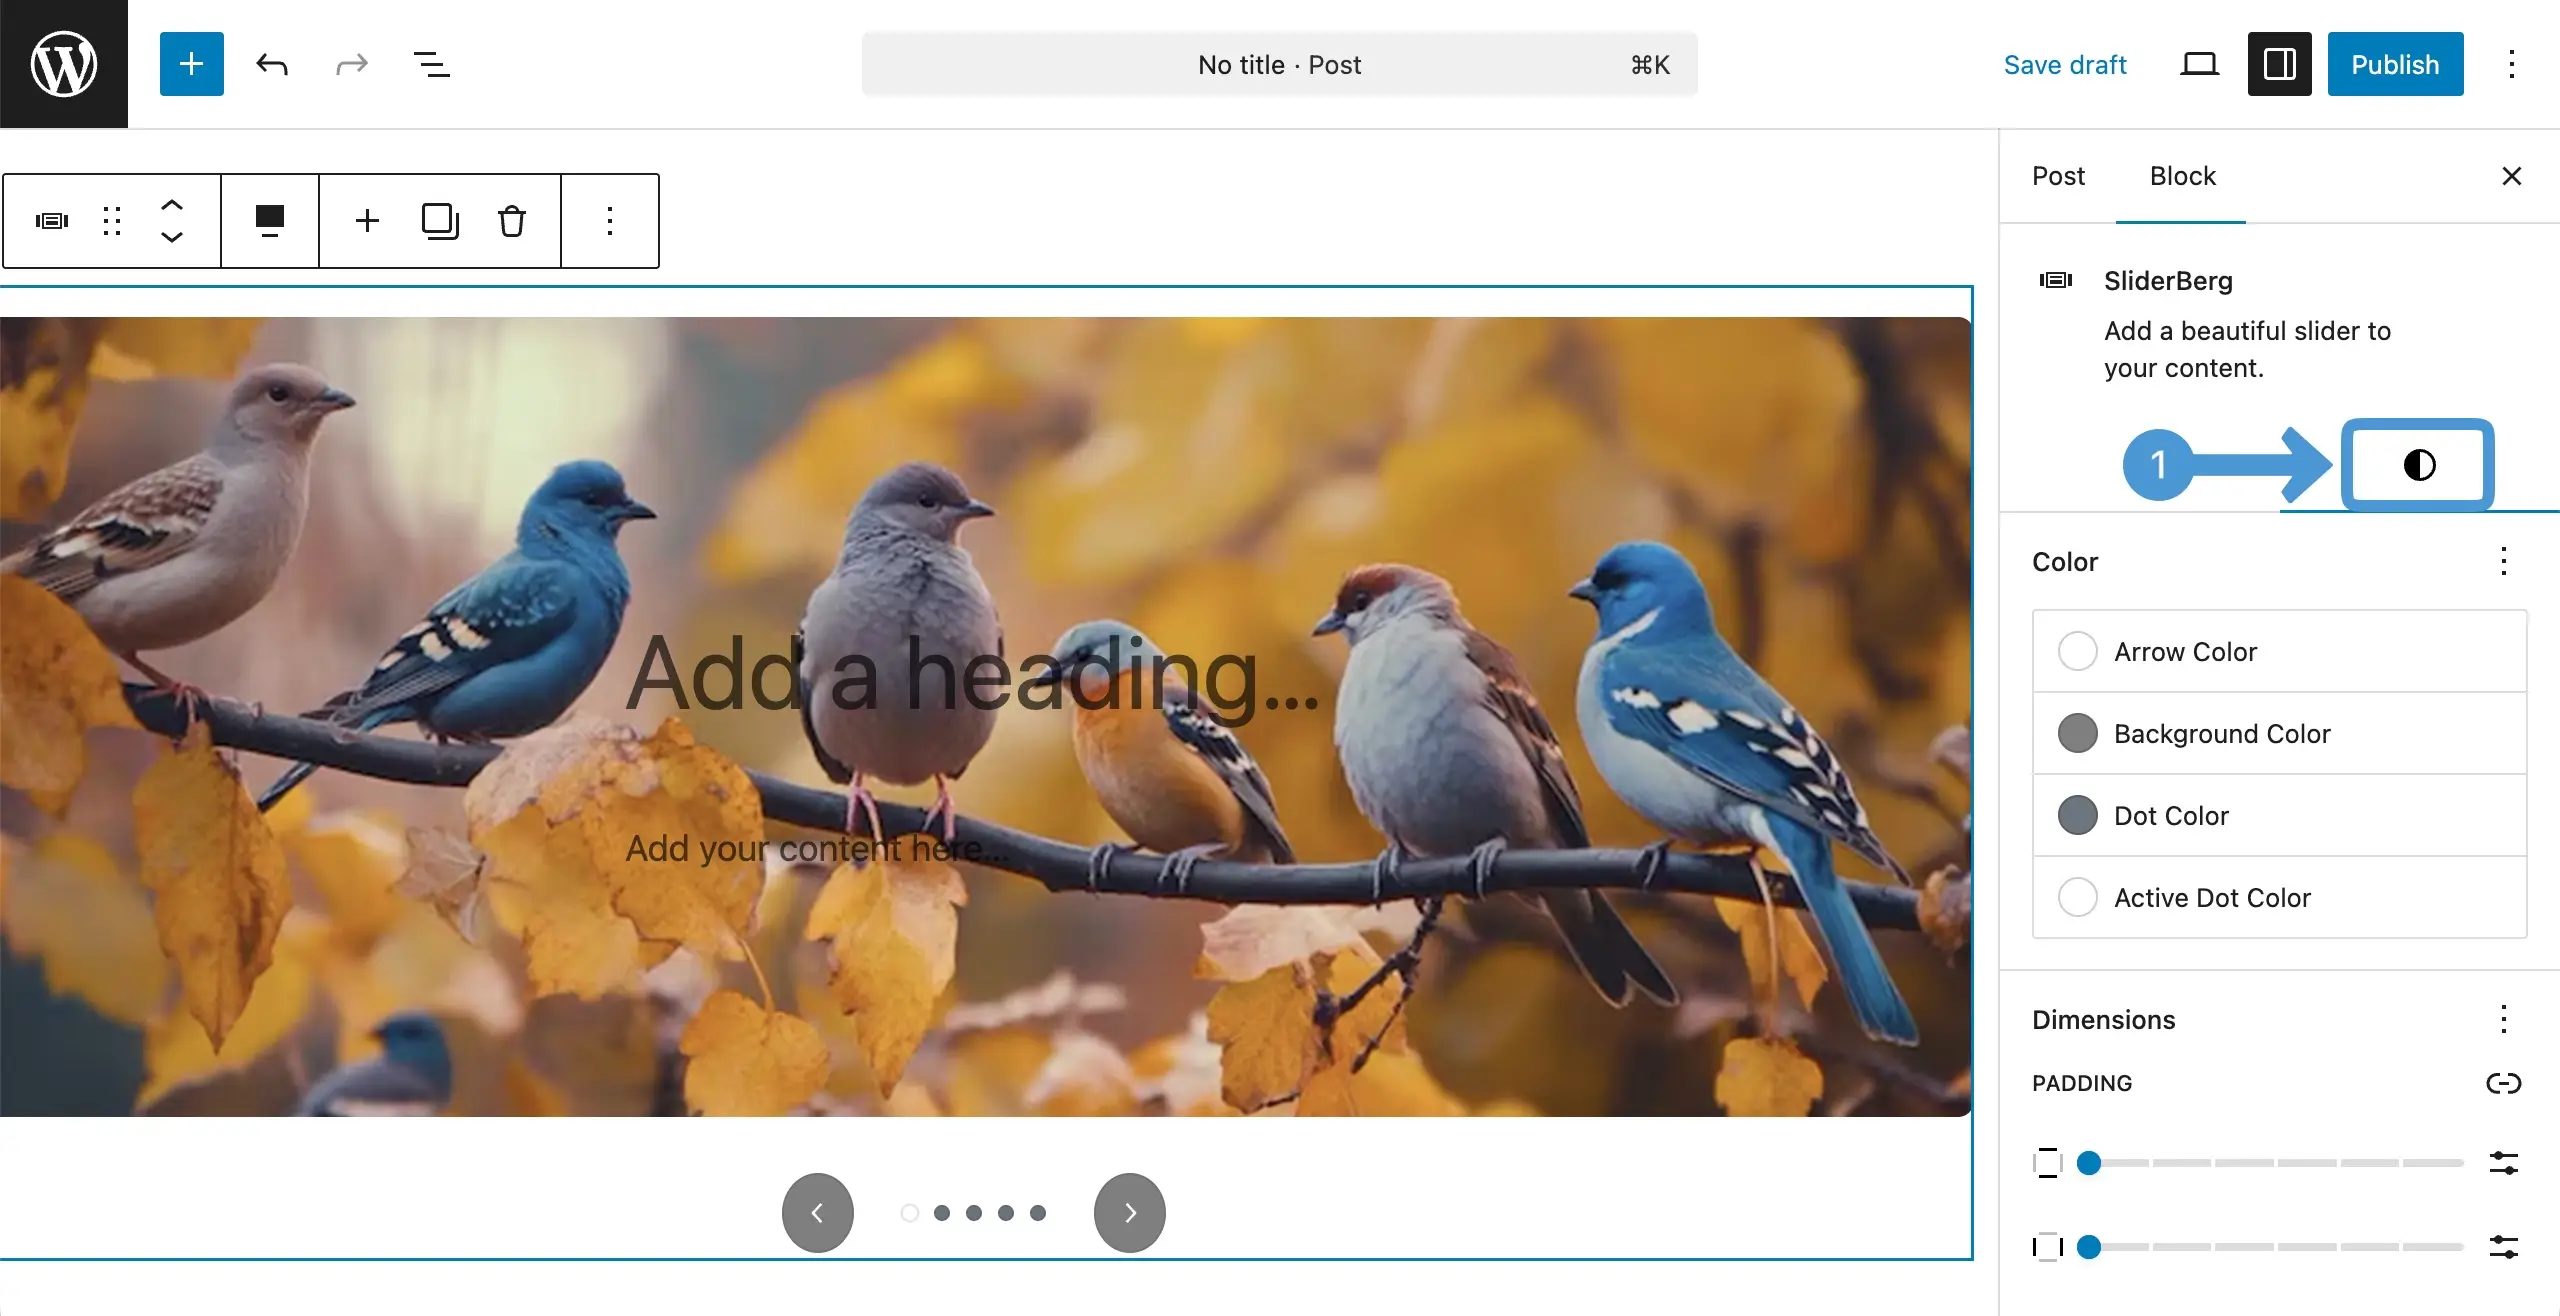
From this tab, you can stylize the color, padding, and margin for the block.

Conclusion #
Thus, you can create your slider with the sliderberg block. You can even add a caption, heading, and description to each image separately. The texts can also be customized by adjusting their color, padding, and margin.
Hope you can do these alone as this process is similar like any other Gutenberg block.


